top of page
MS SQL Server
Wha is it?
-
MS SQL Server is a relational database management system (RDBMS).
-
Developed by Microsoft.
-
This product is built for the basic function of storing and retrieving data as required by other applications.
-
This application may run on same computer or on another across a network.

Usage of SQL Server
-
To create databases.
-
To maintain databases.
-
To analyze the data througn SQL Server Analysis Services (SSAS).
-
To generate reports through SQL Server Reporting Services (SSRS).
-
To carry out ETL operation.(Extract, Transform & Load)
Instance of SQL Server
-
An instance is an intallation of SQL Server.
-
If we intall 'n' times, then 'n' intances will be created.
-
There are two type of instances in SQL Server.
-
Default Intsance (only one)
-
Named Instance (many)
-
Default intance service name is MSSQLSERVER.
Advantage of Instances
-
To intall different version in one machine.
-
To maintain developement, test, and production enviroments separately.
-
To separe security privileges.
SQL Server Installation
-
Here is the process of downloading and installing the Microsoft SQL Server 2012.

-
Here is the process of downloading and installing the Microsoft SQL Server 2012.

-
Double-click the “SQLFULL_x64_ENU_Install.exe”, it will extract the required files for installation in the “SQLFULL_x86_ENU” folder.

-
Double-click on .exe file to extract the files to a folder.
.exe File
-
Open that SQLFULL_x64_ENU folder.
-
Double-click "setup" application.

Double-click on setup application
-
Once we click on setup, the following application will open.
-
Click Installation which is on the left side of the above screen.
-
Click on the first option of the right side seen on the below screen.

-
Click OK and the following screen pops up.
-
Accept the license option and click Next.
-
Select SQL Server feature installation option and click Next.
-
Select Database Engine Services checkbox and click Next.

-
Make sure authentication mode selection and administrators are checked > click Data Directories.
-
Follow the instruction and click on Next.
-
Here we got a successful installation.

SQL Server Management Studio
-
SQL Server Management Studio is a workstation or a client tool which is used to connect to and manage your SQL Server.
-
It is a graphical interface instead of the command line.
-
If you don't have the SSMS, but you have SQL instances.
-
The following method is to download the SQL Management Studio(SSMS).

-
Click on the Installation > New SQL Server stand-alone installation.
-
Follow the simple steps and finish the installation process.

-
In order to connect to a remote instance of an SQL server, you will need this or similar software.
-
It is used by Administrators, Developers, Testers, etc.
-
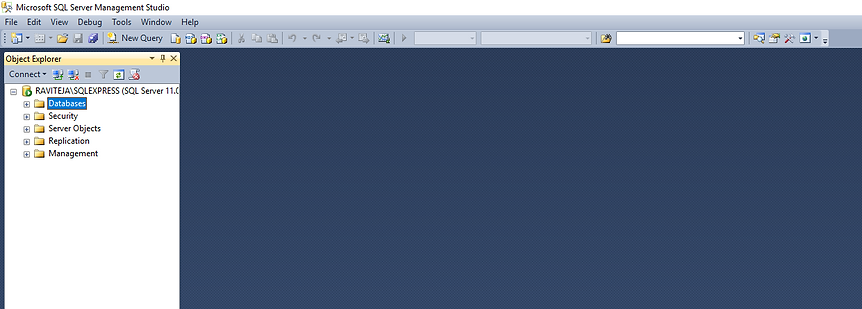
This is how to open the SSMS tool.

-
If you open the MMSM tool.
-
This will ask for a server name as Computer_Name/ SQLEXPRESS.
-
Click Connect.

-
Type the default server Account_Name/SQLEXPRESS
-
This Microsoft SQL Management Studio looks like below.
SQL Server Data Types
-
There are 3 types of data types.
MySQL
Datatype
Numeric
Data and Time
String
-
The followings are the Numeric Datatypes in SQL Server.
-
The followings are the String Datatypes in SQL Server.
-
The followings are the Date/Time Datatypes in SQL Server.
Creating a Database
-
To work with a RDBMS, we need to create a database.
-
Here are the steps to create a database.
-
Right-click on Database > New Database > a new window will pop up.
-
Provide a database name > Next.
-
Database created.

CREATE Table
-
To create a table we create a query as:
-
CREATE TABLE table_name ( column1 datatype, column2 datatype ...);
-
Click on Execute button or press F5.

-
Another way to create a table is as following.
-
SSMS allows a user some funtion of RDBMS with some mouse click.
-
Click on Database > Right click on Table > New Table.. > A window will appear on right.
-
Provide the Column name, Data type and null details.
-
Click on Save button > Give a name > Ok.
-
A table is created.

Provide the colunm details
INSERT Table
-
INSERT statement is used to insert data into a table.
-
Syntax: INSERT INTO database_name.dbo.table_name ( col3 , col4 , etc ) VALUES ( 'Stirng' , number ) ;
-
Press F5 or execute button to run the query.
-
The messages window has a message that a row is affected.

-
With the SSMS tool, we can insert the data into the table.
-
Navigate the table name > Edit Top 200 Rows.

-
This window will appear, here a user can insert the values and save.

UPDATE Table
-
To work with a RDBMS, we need to create a database.
-
Here are the steps to create a database.
-
Right-click on Database > New Database > a new window will pop up.
-
Provide a database name > Next.
-
Database created.
SELECT Table
-
The SELECT statement is used to retrieve the data from the Database.
-
Here is the syntax:
-
SELECT colunm1, column2, column3, etc FROM table_name;
-
Here the result shown in below window.

Output
Query to be executed.
-
With the mouse click, here are the steps to execute a SELECT statement.
-
To retrieve the data from the table, right-click on the table_name > Select Top 1000 Rows.
-
In the right panel, it writes the script for select and shows all data from the corresponding table.

Output
Query to be executed.
SELECT DISTINCT
-
The SELECT TOP clause is used to specify the number of records to return.
-
Inside a table, a column often contains many duplicate values; and sometimes you only want to list the different (distinct) values.
-
The SELECT DISTINCT statement is used to return only distinct (different) values.
-
Syntax: SELECT DISTINCT column_name FROM table_name;
-
To list all the city on the table, SELECT DISTINCT city FROM student;
-
Here are the example of the a Library table have hundreds of books.

SELECT COUNT
-
COUNT() is a function.
-
Return the number of records in the result table.
-
Syntax: SELECT COUNT(expression) FROM table_name Conditions;
-
Here is the example of how many book category we have in library.

Filter Table
-
To work with a RDBMS, we need to create a database.
-
Here are the steps to create a database.
-
Right-click on Database > New Database > a new window will pop up.
-
Provide a database name > Next.
-
Database created.
ALTER Table
-
The ALTER TABLE statement is used to add, delete, or modify columns in an existing table.
-
It is also used to add and drop various constraints on an existing table.
To Add a Column
-
To a new column, we can use ADD keyword.
-
Syntx: ALTER TABLE table_name ADD column datatype, col2 datatype, col3 dataype;
To Drop a Column
-
To drop an existing column in a table, the syntax is:
-
ALTER TABLE table_name DROP COLUMN column_name;
To Modify a Column (only Datatype)
-
To change the datatype of an existing column in a table, here is the query.
-
Syntax: ALTER TABLE table_name ALTER COLUMN column_name datatype(30);
To Rename a Column/Table
-
In SQL server, there are some stored procedures for renaming the table/column.
-
For renaming a column, syntax is: sp_rename 'table_name.column_name' , 'new_column_name' , 'COLUMN' ;
-
For renaming a table, syntax is: sp_rename 'table_name' , 'new_table_name';
DELETE Table
-
To work with a RDBMS, we need to create a database.
-
Here are the steps to create a database.
-
Right-click on Database > New Database > a new window will pop up.
-
Provide a database name > Next.
-
Database created.
-
Aggregating Function
-
...max( column )
-
...avg( column )
-
...sum( column )
-
...min( column )
-
Quering in Subquery
-
...IN
-
...NOT IN
-
...LIKE
-
Restricting Grouped Result With HAVING
-
...eg WHERE student_mark > 80 *** it serches for Individual value
-
...eg HAVING student_mark > 80 *** it serches for Grouped Value
-
Calculating Results with CASE
-
...eg CASE WHEN condition1 THEN "value1 "
-
WHEN condition2 THEN "value2"
-
WHEN condition3 THEN "value3"
-
WHEN condition4 THEN "value4"
-
ELSE "value5"
-
END as "Column_Name"
-
JOIN in Table
-
...Cross Join (without JOIN query)
-
...Implicit Inner Join (without JOIN query)
-
...Explicit Inneer Join (JOIN query)
-
...LEFT OUTER JOIN ON
-
...RIGHT OUTER JOIN ON
-
...Seft JOIN
-
...Combining of JOINs
-
...Full JOIN
-
UPDATE, INSERT, DELETE
-
ALTER, CREATE, DROP
Importing Excel Data into SQL Server
GRANT/REVOKE Privileges
-
We can use GRANT and REVOKE privileges on various database in SQL server.
-
We can grand a user different privileges to table.
-
These permissions can be any combination of SELECT, INSERT, UPDATE, DELETE, ALTER REFERENCES, or ALL.
-
Syntax: GRANT privileges ON object TO user;
-
We have a Excel sheet data with 5 columns with 391 rows including header.
-
There are steps to import the excel data into a table in our database.
-
Locate the database.
-
Right-click on database > Tasks > Import Data...

-
A Import and Export Wizard pops up.
-
Click next.
-
Provide the Data source as the the file formate.
-
Here I have the excel file formatl.
-
Set the browse path where the file is located.
-
Give the excel version > Next.
Check if it has header
Set Excel version
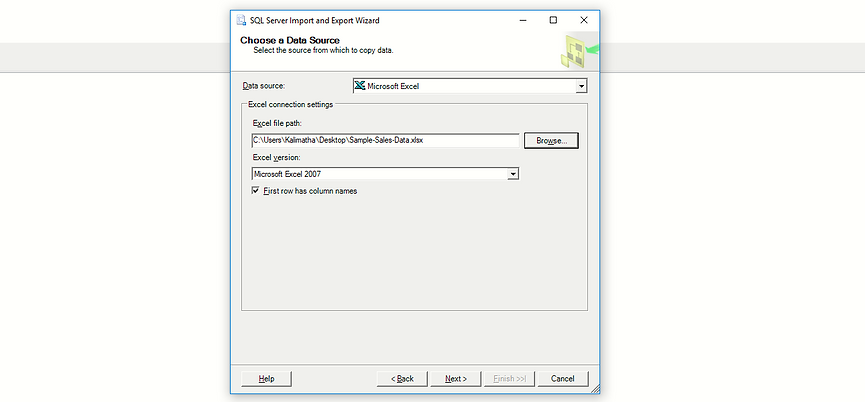
Set file format
Provide the file path
bottom of page